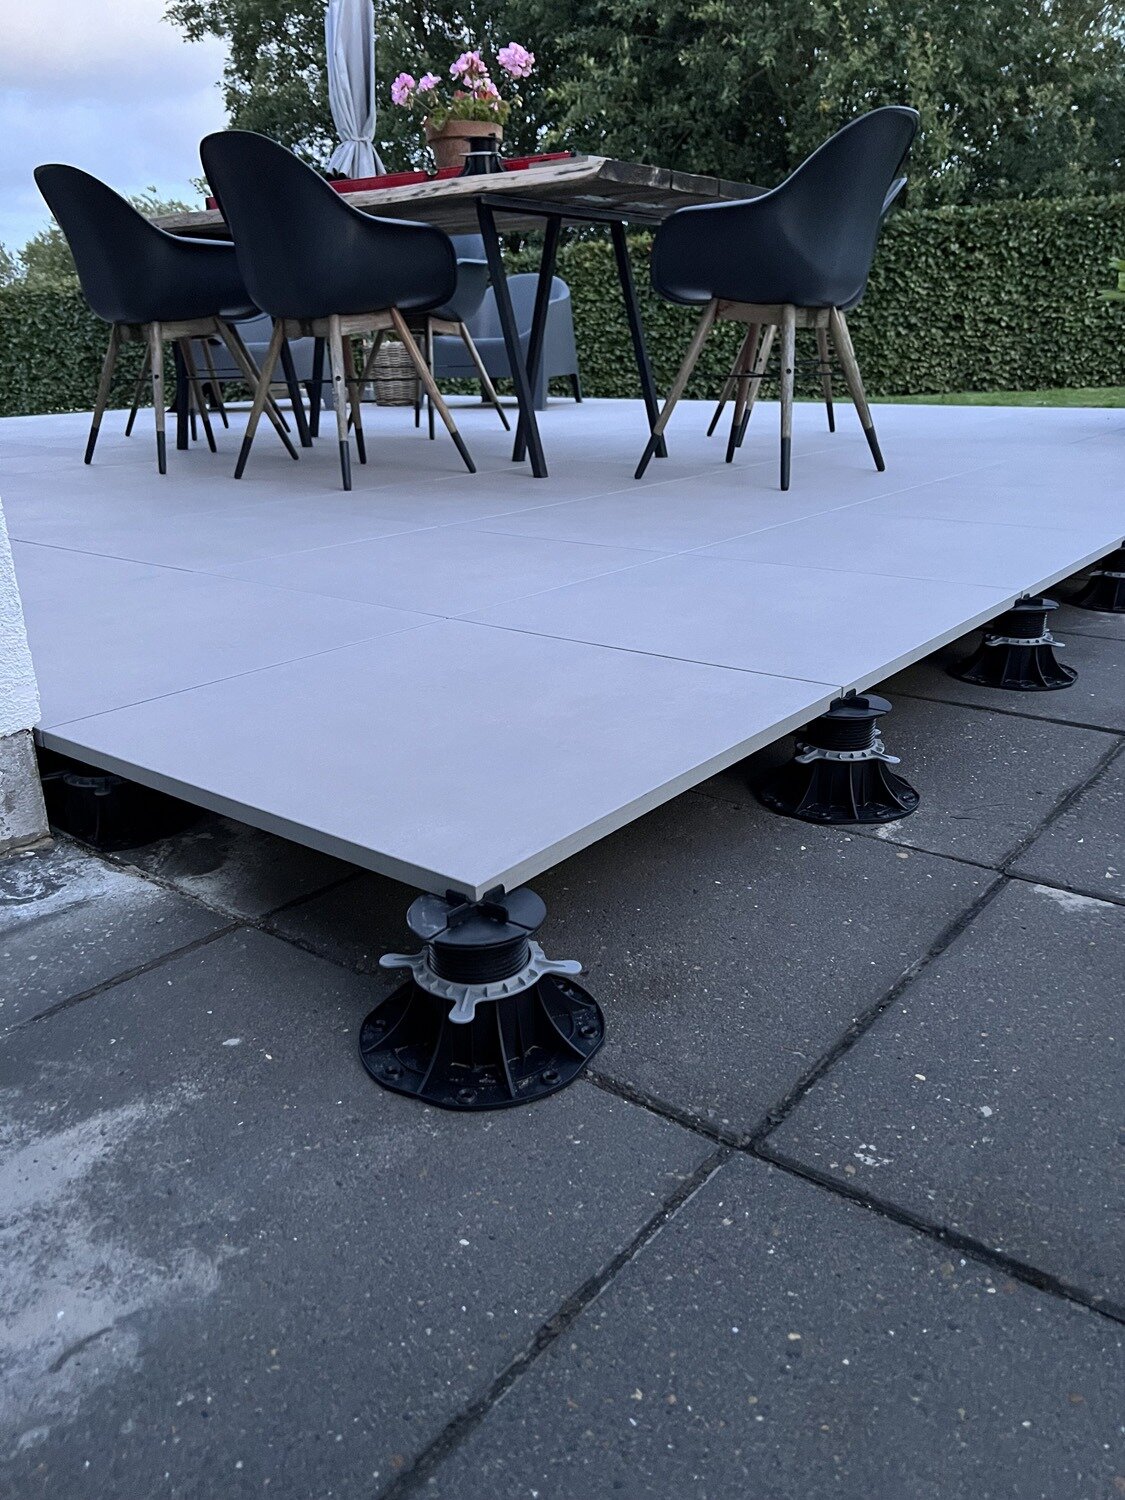
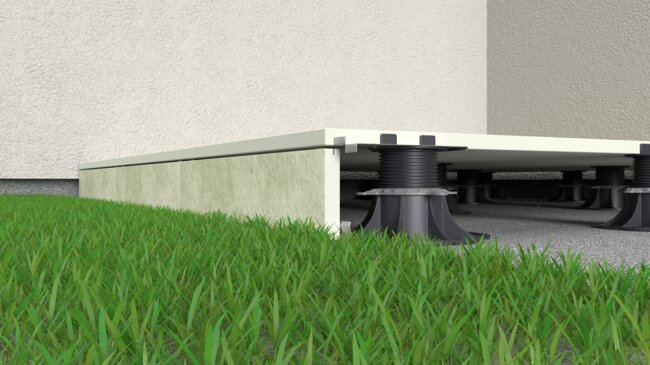
Instead, thick 20 mm (3/4 inch) porcelain stoneware terrace pavers are placed on reinforced, height-adjustable polypropylene terrace pedestals. This construction creates a raised surface with open joints, allowing rainwater to drain underneath while leaving hidden space for pipes, electrical cables, and irrigation lines.
Whether you are a DIY enthusiast looking to improve a concrete slab or a contractor carrying out a commercial rooftop project, this guide covers everything you need to know to install porcelain stoneware terrace pavers on adjustable pedestals step by step.
Why choose porcelain pavers on adjustable pedestals?
Traditional installation of outdoor surfaces requires intensive labor: digging soil, pouring concrete, spreading sand, and grouting joints. Raised pedestal systems simplify installation while offering significant functional advantages:
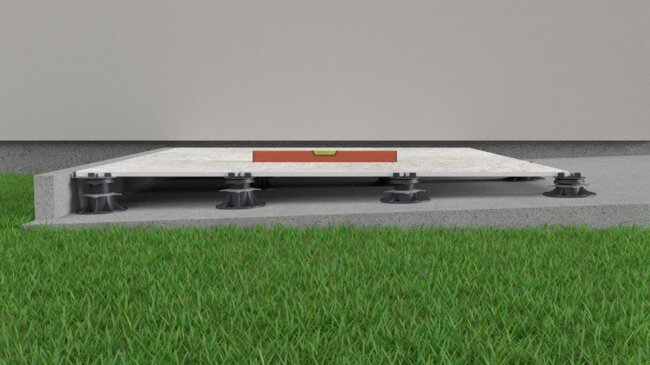
- Excellent slope and height correction: Built-in slope compensators allow you to create a completely level walking surface on uneven ground, sloped concrete terraces, or pitched roofs (up to 5% slope).
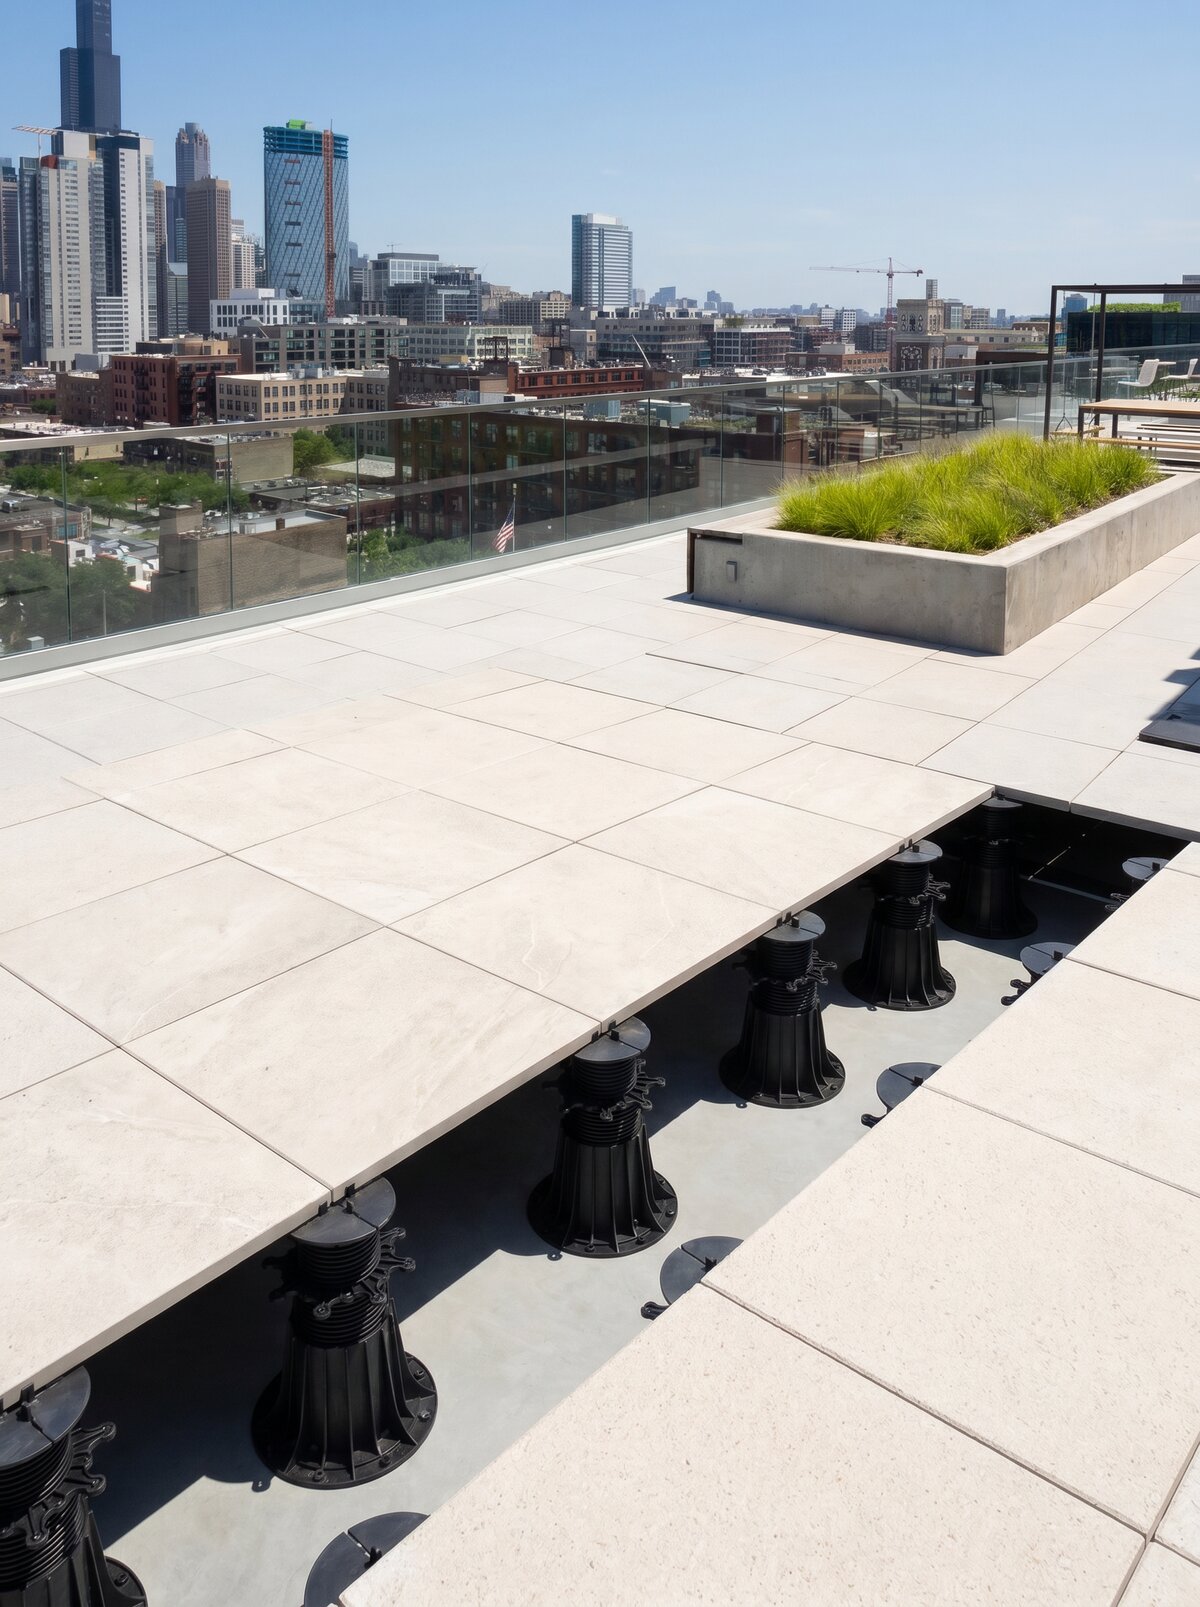
- Effortless drainage: Open joints between pavers allow water to drain directly into the empty space below. This eliminates standing water, puddle formation, and ice accumulation without the need for surface drainage grates.
- Access to underground utilities: Since the pavers are not fixed with mortar, individual tiles can be lifted at any time using a tile suction cup. This allows easy access to waterproof membranes, electrical cables, or plumbing.
- Lightweight construction: Compared to thick concrete slabs laid on sand and stone, porcelain pavers are lightweight (approximately 9–10 pounds per square foot). This makes them ideal for rooftop terraces and balconies with strict structural weight limitations.
- Thermal insulation and air circulation: The open air cavity beneath the pavers creates a thermal barrier that reduces heat transfer to the structural slab while allowing air flow to dry residual moisture.
Required tools and materials
Before starting the project, gather all the necessary tools and materials. Having the right equipment ensures precise cuts and level surfaces throughout the duration of the work.
- 20mm porcelain terrace pavers: Standard structural terrace pavers for outdoor applications (typically 60x60 cm or 30x120 cm)
- Adjustable pedestals: Highly adjustable plastic pedestals with spacer tabs
- Slope correctors: Pedestal accessories used to compensate for substrate slopes
- Acoustic anti-slip rubber pads: 1mm–3mm rubber discs used to stabilize minor differences in tile thickness
- Wet tile saw with diamond blade: Specialized saw designed for cutting dense 20mm porcelain tiles
- Laser level or long spirit level: Essential for establishing base heights around the entire perimeter
- Chalk line and string line: For maintaining straight grid alignment throughout the installation
- Double-suction vacuum tile lifter: Safe handling and placement of heavy porcelain tiles
- Perimeter clips for pedestals (optional): Stainless steel clips used for aesthetically finishing open edges
- Tape measure and utility knife: For measuring spans and trimming pedestal bases or spacer tabs
Substrate preparation and substructure requirements
Adjustable pedestal systems rely on a stable, solid substrate. Although a sand or gravel base is not required, the surface underneath must be structurally load-bearing and capable of carrying the dead load of the pavers and the live load of pedestrian traffic.
Suitable Substrates
- Existing concrete slabs: Ideal foundation. Make sure the slab is structurally stable, free from major cracks, and properly sloped away from buildings for water drainage.
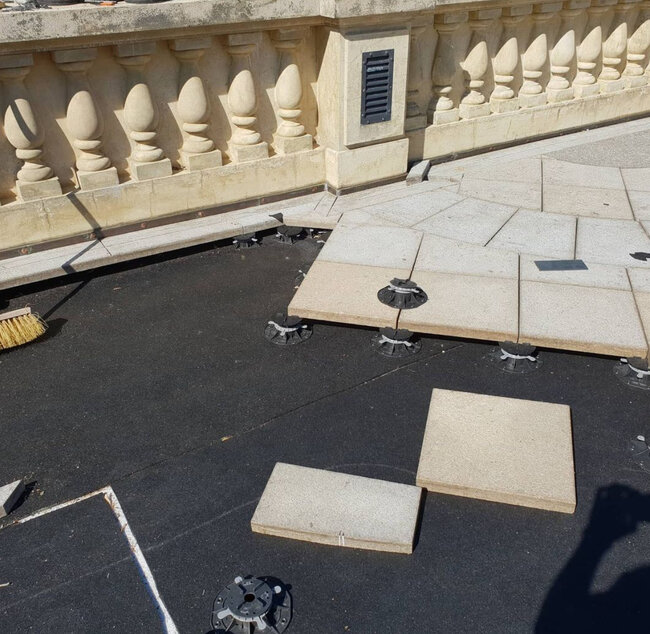
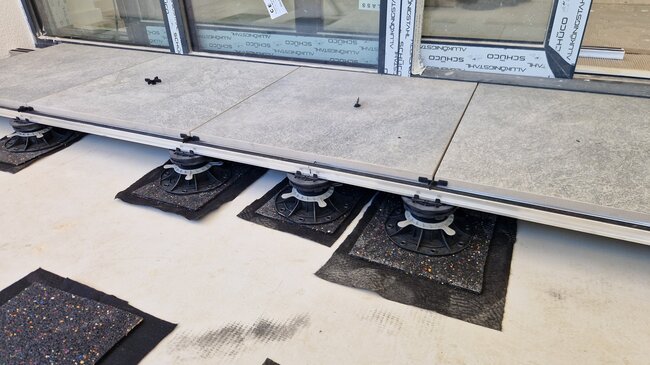
- Roof membranes and balconies: Pedestals can be placed directly on waterproof membranes (EPDM, TPO, or modified bitumen). Always install rubber protective pads under the pedestal bases to prevent puncturing the membrane.
- Compacted aggregate base: For ground-level installations on soil, excavate 10–15 cm, lay geotextile fabric, and compact 3/4-inch crushed stone to 98% density. Place concrete pavers directly under each pedestal to prevent settling.
WARNING: Never install adjustable pedestals directly on soft soil, sand, or uncompacted ground. Over time, the weight of foot traffic pushes the pedestals into the ground, causing severe settling and uneven surfaces.
Step 1: Calculate Layout, Height, and Slope
Proper planning prevents unsightly paver cuts and ensures that pedestals will match the required finished surface height.
- Determine the finished floor elevation (FFE): Measure down from door thresholds, siding lines, or railings to determine where the top surface of the porcelain paver must be. Remember to leave 1/2 inch of clearance below exterior door thresholds to prevent water infiltration.
- Determine the required pedestal height: Subtract the thickness of the porcelain paver (typically 20 mm or 3/4 inch) from the FFE to find the required pedestal head height. Choose pedestals offering an adjustment range that covers the lowest and highest points.
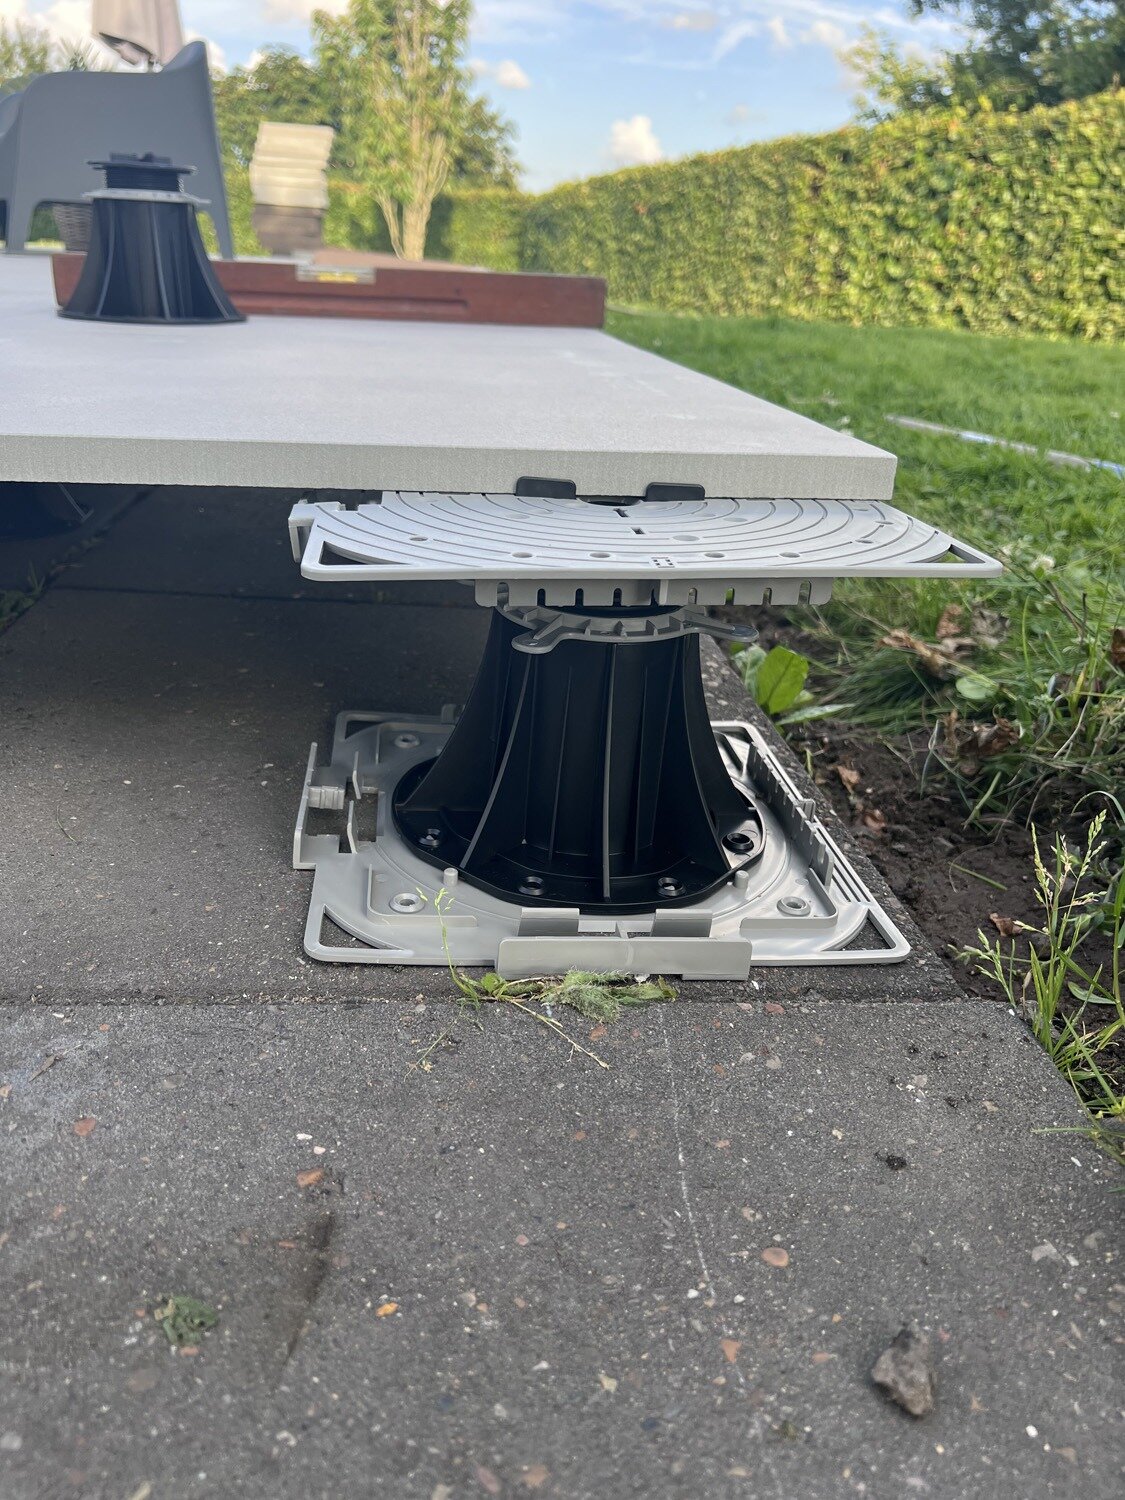
- Measure the substrate slope: Use a level with a slope measurement function or a digital angle meter to calculate the drop. If the substrate has a slope greater than 1%, install slope compensation discs at the base of the pedestal or use self-leveling pedestal heads to ensure a perfectly flat top surface.
- Plan the paver grid: Measure the total width and length of the space. Center the grid pattern so that edge cuts at opposite walls have equal width and no perimeter paver is cut narrower than half its original size.
Step 2: Preparing pedestals and perimeter support
Pedestal heads are equipped with integrated spacer tabs (typically 2 mm, 3 mm, or 4 mm), which create even gaps between pavers. To place pedestals tightly against perimeter walls or corners, the pedestal heads and bases must be modified.
Modifying Pedestals for Edges and Corners
- Corner pedestals: Break off three of the four spacer tabs on the pedestal head using pliers. Trim the round base along the pre-marked cut line on the underside so the pedestal sits flush against two adjoining walls.
- Perimeter/edge pedestals: Break off two adjacent spacer tabs to leave a flat surface for the paver edge, while keeping two tabs to separate adjacent pavers. Trim one side of the round base flat to align with the wall.
- Middle pedestals: Leave all four spacer tabs intact.
EXPERT TIP: Don't throw away the broken-off spacer tabs. Keep them in your tool bag; they can be used as vertical shims or manual spacers near irregular wall transitions.
Step 3: Establish the baseline and place corner pedestals
Starting from a square, level baseline ensures the entire terrace will be aligned without shifting off the grid.
- Establish a chalk line parallel to the main wall or foundation of the house, offset by the exact width of one paver plus a 3/16-inch perimeter gap.
- Place the first corner pedestal at the highest point of the installation area. Adjust its height using the screw thread until the top of the pedestal head is exactly one paver thickness below the target finished surface height.
- Place the second pedestal along the perimeter baseline at the other end of the row.
- Stretch a taut string line between the two pedestals to maintain a straight line and consistent height for all intermediate pedestals.
Step 4: Lay the first row of porcelain terrace pavers
Porcelain terrace pavers are extremely dense and heavy. Handle them carefully to avoid chipping the corners.
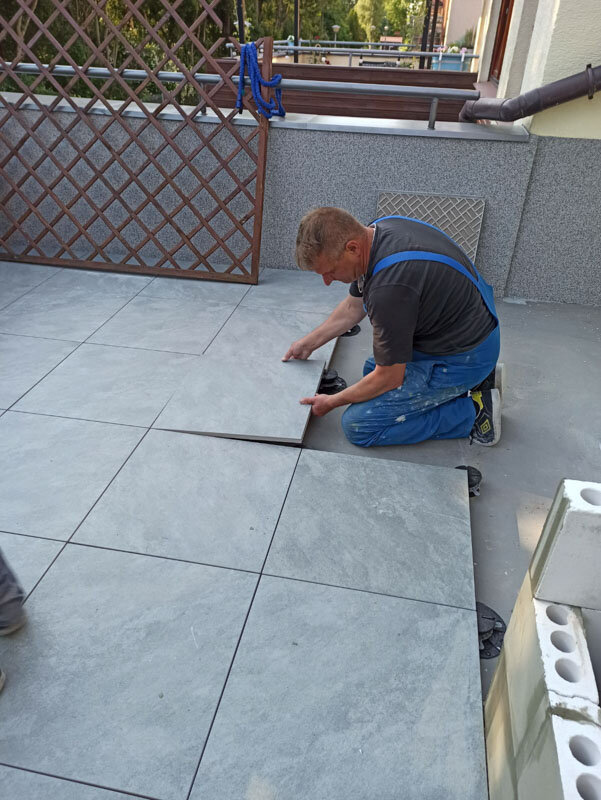
- Place the first porcelain terrace paver on the corner pedestal, aligning the paver corners with the spacer tabs.
- Place adjacent pedestals under the remaining corners of the first paver.
- Use a 120 cm spirit level on the paver surface in both directions (lengthwise and widthwise).
- Turning the threaded column of each pedestal raises or lowers the corner height. Adjust precisely until the paver is perfectly level.
- Place 1 mm or 2 mm anti-slip rubber shims on top of each pedestal quadrant where the paver rocks slightly. Rubber shims dampen impact noise and compensate for minor differences in paver thickness.
See also: MAX pedestal 75-150 mm with D3 for tiles
WARNING: Porcelain terrace pavers must be supported at all four corners. For pavers longer than 60 cm (e.g., 30"x120" or 60"x120"), install an additional mid-support pedestal along the long edges or directly under the center of the paver to prevent the center from sagging under heavy loads.
Step 5: Expand the grid and constantly check alignment
Once the first row is stabilized and leveled, expand the installation outward row by row.
- Slide in intermediate pedestals: As you lay each new paver, slide a pedestal under the spot where four paver corners meet. The four spacer tabs will naturally align the corners while maintaining straight 2–4 mm drainage gaps.
- Check grid straightness every 3 rows: Stretch a string line along the open gap line to verify that the gaps are not shifting. Even a 1/16 inch deviation over ten feet will cause the line to shift on a large terrace.
- Check surface level: Constantly place a long level across multiple installed pavers. Never assume that leveling one paver guarantees the next one will fit; adjust the pedestal height couplers as you progress.
Step 6: Cutting and fitting edge boards
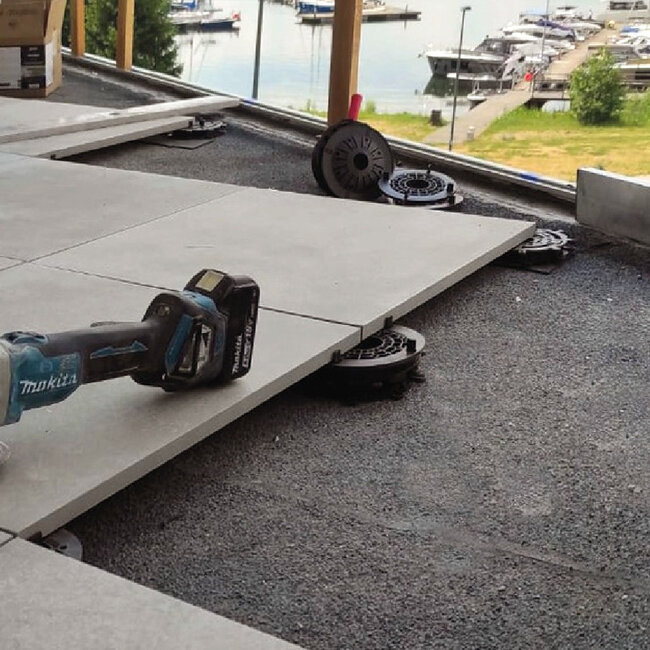
Perimeter walls and obstacles such as posts or drainage pipes require cut porcelain tiles. Cutting external porcelain tiles with a thickness of 20 mm requires appropriate tools — standard manual tile cutters will not cut through structural porcelain with a thickness of 20 mm.
How to cut 20 mm porcelain pavers to achieve clean edges
- Use a wet saw: Use a high-torque wet tile saw equipped with a continuous-rim diamond blade specifically designed for hard porcelain.
- Measure and check twice: Measure the distance from the edge of the second-to-last paver to the wall. Subtract the width of the perimeter expansion gap (usually 3/16 inch to 1/4 inch) to allow for building movement and drainage at the wall.
- Mark the cut line: Mark the cut line on the paver surface with a wax pencil or painter's tape to prevent the blade from chipping along the glaze edge.
- Cut slowly: Slowly feed the porcelain paver through the wet saw. Pushing the paver through the blade too quickly can cause thermal stress, resulting in chipped edges or uneven cracks.
- Smooth the edge: Gently run a diamond hand pad or diamond polishing disc along the freshly cut edge to remove micro-burrs and sharp corners.
Step 7: Final Adjustments, Locking, and Perimeter Closure
Once all full and cut pavers are laid, perform a final inspection to lock in the installation.
- Walk the surface: Walk across each section of the terrace. Listen for clicking sounds or slight movement underfoot, which indicates a corner that is not sitting flush on the pedestal support pad.
- Insert shims under loose corners: Lift loose corners using a dual-suction vacuum lifter and insert thin rubber shims to eliminate any residual rocking.
- Lock the pedestal collars: If your adjustable pedestals have locking rings or set screws on the threaded stems, tighten them to prevent the pedestal height from changing over time due to vibration or expansion cycles.
- Install edge clips or vertical steps: If your raised deck terrace has exposed, open sides (not bounded by walls), install vertical perimeter clips to hold the vertical cut porcelain pavers. This conceals the pedestals and gives the terrace a solid, finished stone-edge appearance.
##
Troubleshooting common installation errors
Even with careful planning, open-gap pedestal systems can encounter minor installation challenges. Here is how to fix the most common problems:
1. Paver tilts diagonally
- Cause: Minor differences in paver thickness created during the production process or uneven seating of the pedestal on the substrate.
- Solution: Lift the paver using a suction cup. Add a 1 mm or 2 mm rubber shim to that specific quadrant of the pedestal head that is lower.
2. Pedestals tilt or lean
- Cause: The substrate surface has an aggressive slope, causing the pedestal column to tilt instead of standing vertically.
- Solution: Install a slope corrector disc at the base of the pedestal before setting the column. Base slope correctors adjust slopes from 0% to 5%, ensuring the central column stands vertically at a 90-degree angle.
3. Open joints shift or are crooked
- Cause: Pressing the pavers too firmly onto the spacer tabs, bending them, or failing to cut the pedestals evenly at edge walls.
- Solution: Run a string line along the entire row. Use a small pry bar to gently shift entire lines of pavers back into the correct position. Make sure the spacer tabs sit firmly against the edges of all four adjoining pavers.
4. Edge pavers slide outward
- Cause: Lack of perimeter restraint or dynamic foot traffic pushing the perimeter pavers away from the grid.
- Solution: Ensure that the edge pavers are restrained by a solid wall, dynamic perimeter shims, or heavy stainless steel edge clips screwed to the pedestal system.
Long-term maintenance and care
One of the main reasons contractors and homeowners prefer porcelain pavers on pedestals is their exceptionally low maintenance requirements. Porcelain absorbs less than 0.5% water, making it non-porous and resistant to stains, mold, and damage related to freeze-thaw cycles.
Routine Cleaning
- Sweeping: Regularly sweep leaves, dirt, and organic debris that accumulate on the surface. Debris that gets into open joints can slow down water drainage over time.
- Pressure Washing: Clean the surface twice a year using a standard pressure washer (up to 2,000 PSI) with a wide fan nozzle. Keep the spray nozzle at least 12 inches away from the surface.
- Stain Removal: Because porcelain is non-porous, oil, grease, wine, and grill splatters remain on the surface. Wash them off with hot water and a mild household degreaser or a neutral pH tile cleaner.
Drainage inspection under the terrace
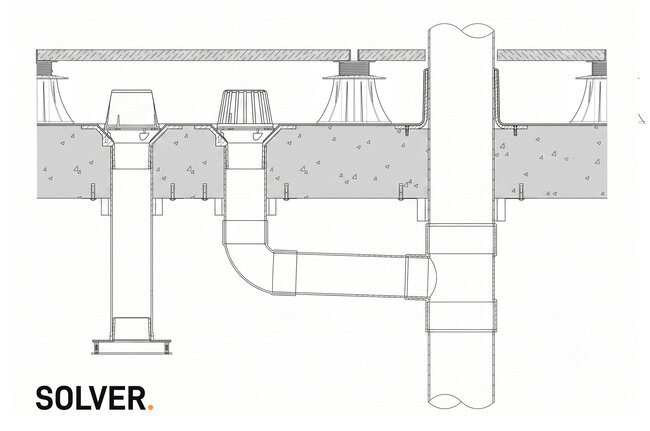
Once or twice a year, use a paver vacuum suction cup to lift one or two pavers near floor drains or areas where debris accumulates. Check the substrate under the pedestals to remove accumulated silt or leaves, ensuring free water flow to floor drains or gutter outlets.
Winter Care and De-Icing
Porcelain pavers easily withstand winter freeze-thaw cycles without cracking. When removing snow or ice:
- Use snow shovels with a plastic blade instead of shovels with a metal edge to prevent scratching the paver surface.
- Use standard de-icing agents based on calcium chloride or road salt; non-porous porcelain will not degrade or pit under the influence of chemical ice-melting agents.
By following this installation process — preparing a stable base, maintaining a precise baseline, leveling each paver corner, and securing the perimeters — you create a flat, beautiful outdoor space built to withstand heavy foot traffic and harsh weather conditions for decades.
Which specific aspect of your layout are you currently planning, such as calculating pedestal heights, handling complex perimeter cuts, or selecting slope correctors?